
Network load balancing is an excellent feature of the Microsoft Server Family operating systems. It allows the setup to make use of a single IP address to balance the load between two or more machine. In this article I’ll explain step by step on how to setup network load balancing on Windows Server 2003 using a single network adapter. For testing whether this configuration works I’ve setup IIS (Internet Information Services) but testing can also be done some other way.
The basic requirements for setting up Network Load Balancing:-
- Two or more servers running the same service (e.g. IIS)
- Both the servers should have a Windows Server Operating System installed.
- IIS should be installed and running on both the servers.
- The IP addresses for both the servers should be static i.e. manually assigned (DHCP should not be used)
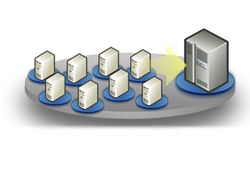
For this article I’ve used two servers running IIS on Windows Server 2003 and one client with Windows 7. The following diagram will make things clear

Step 1:- Setting up IIS on both servers
The first step is to ensure IIS is setup and running on both the windows servers. To install IIS go to control panel -> Add/Remove Programs -> Add/Remove Windows components -> select Application server, click details and tick Internet Information Services (IIS). Click OK then Next. Installation will start now and prompt you for the Windows Server 2003 OS CD. After installation go to C:\Inetpub\wwwroot create a file named default.htm. Type the following html code into that file
<html>
<body>
<h1>This is Server 1</h1>
</body>
</html>
Do the same in your second server also but while creating the default.htm file replace the word “server 1” with “server 2” so that the difference is noticeable when running load balancing.
Test whether both the IIS servers are functioning properly. To check this fire up your browser on both machines and type http://localhost/ you should see the following page

Now that IIS is up and running its time to configure IP addresses on both servers.
Step 2:- Configure IP addresses
Go to server 1 Control Panel -> Network Connections -> Right-click Local Area Connection -> Properties. Select Internet Protocol (TCP/IP) -> Properties and manually assign IP addresses as follows
IP address: 192.168.0.2
Subnet Mask: 255.255.255.0
You can also enter your gateway address (usually the modem or router) and DNS address. But in the setup I’m doing it isn’t required.
Now go to server 2 Control Panel -> Network Connections -> Right-click Local Area Connection -> Properties. Select Internet Protocol (TCP/IP) -> Properties and manually assign IP addresses as follows
IP address: 192.168.0.3
Subnet Mask: 255.255.255.0
Finally assign the client computer an IP address in the same range i.e. 192.168.0.x (x is between 4 to 254)
Step 3:- Configure Load Balancing IP address
This is that crucial step in setting up network load balancing and if it isn’t done properly will end up with a non-working configuration.
Server 1:-
Open the Local Area Connection’s properties of server 1, tick Network Load Balancing option, go to properties. Under cluster parameters enter the following in cluster IP configuration
IP address: 192.168.0.10 (This is the virtual IP address)
Subnet Mask: 255.255.255.0
Full Internet Name: cluster.domain.com (Enter your domain name associated with the cluster. If you have not registered any domain name or wish to use the IP address itself leave it blank)
Next under the Cluster Operation mode select Unicast or Multicast. So what is the difference between the two ?
When unicast is selected all the hosts (computers) in a cluster share an identical unicast MAC address. Network Load Balancing overwrites the original MAC address of the cluster adapter with the unicast MAC address that is assigned to all the cluster hosts.
When multicast is selected the original MAC address is retained by each host in the cluster.
So what should you select ? In this configuration multicast should be selected, because is unicast is selected peer-to-peer communication between the cluster hosts is not possible as an identical MAC address is assigned to all network adapters. This limitation can be overcome by using multiple network Adapters.
Under the host parameters tab set the priority as 1 and under Dedicated IP configuration enter the IP address of server 1.
IP address: 192.168.0.2
Subnet Mask: 255.255.255.0
So with the Network Load Balancing Properties done press OK. Now is the most important step, assigning the IP to the adapter. Go to the Internet Protocol (TCP/IP) properties and click advanced, under the IP settings tab click Add and enter the cluster‘s IP address.

Click OK thrice and the configuration for server 1 is over.
Server 2:-
The configuration is same as server 1 except for a few changes
- Under host parameter in Network Load Balancing properties set the priority as 2.
- Enter the same cluster IP address (192.168.0.10) under cluster parameters.
- In the dedicated IP configuration enter the IP address as 192.168.0.3
- Enter the IP address of the cluster (192.168.0.10) under the IP addresses in the Advanced TCP/IP settings.
Click OK thrice. Now its time to check whether the IP addresses have been correctly assigned. Go to the command prompt of both the servers and type ipconfig /all and you’ll a screen like this

If everything is correct move on to the next step which is testing the configuration.
Step 4:- Testing the setup
So its time to test whether it works, so go to the client system open the web browser and type the cluster IP address http://192.168.0.10/ and you’ll see the web page stored in Server 1

To check server 2 disable the network adapter of server 1 (Control Panel -> Network Connections -> Right-click Local Area Connection and click disable) refresh the web browser on the client and viola! you see the web page stored in Server 2

Now even if you enable server 1’s network adapter you’ll still see server 2’s content. To get back to server 1 disable server 2’s network adapter and refresh the web browser.
Thats it you’ve successfully configured network load balancing using a single network adapter. You can add any number of hosts to this cluster by editing their network adapter’s Network Load Balancing settings.


realy good and delpy understandable tutorial.
thank you
Excelent Blog. very useful.
thx
with Regards
Pravesh sharda
Clearly Understandable good one
Hi Jesin, This is a very good articles, which makes readers to understand NLB. It’d be more nice if you had included some more snapshots of the NLB configuration.
Anyways nice one.
-Alan.
This the best ever article for Network Load balancing. Thanks so much. Please i also need some help on clustering steps using cluster administrator in server 2003