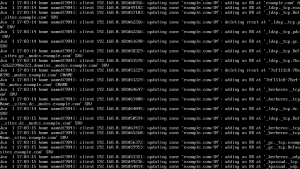
Setup Linux BIND DNS server to work with Windows Active Directory. All you need to do is to allow updates from the active directory domain subnet and you’re good to go. Since this article involves more of Linux than Windows I’ve placed this article in the category Linux. First install a Windows Server OS and a Linux distribution, any Linux flavour will do. Install BIND DNS on the Linux server and do the necessary basic configurations.
BIND users open the following file
/etc/named.conf
BIND chroot users open the following file
/var/named/chroot/etc/named.conf
Add the following lines to the end of the file
zone "example.com" {

type master;

allow-query { any; };

allow-update { 192.168.0.0/24; };

file "slaves/ddns/example.com.zone";

};
zone "0.168.192.in-addr.arpa" {

type master;

allow-query { any; };

allow-update { 192.168.0.0/24; };

file "slaves/ddns/0-168-192.zone";

};
The IP prefix entered in the allow-update option represents the entire domain example.com, if your domain spans more than one subnet add those IP prefixes also. The same applies to the reverse DNS zone. In the above example my network part of the IP address is 192.168.0 hence the zone 0.168.192.in-addr.arpa Note that the zone files are stored in the slave folders. This is because when dynamic DNS updates are sent the named process creates temporary files in the directory of the zone file, so if you place the file in the usual location temporary files will not be created due to insufficient permissions. Our next step is to create the ddns directory inside the slaves directory to distinguish zone files acquiring dynamic DNS updates and create zone files inside them.
BIND users
mkdir /var/named/slaves/ddns

chown named:named /var/named/slaves/ddns

chmod 755 /var/named/slaves/ddns

chcon -t named_cache_t /var/named/slaves/ddns

touch /var/named/slaves/ddns/example.com.zone

chown named:named /var/named/slaves/ddns/example.com.zone

touch /var/named/slaves/ddns/0-168-192.zone

chown named:named /var/named/slaves/ddns/0-168-192.zone
BIND chroot users
mkdir /var/named/chroot/var/named/slaves/ddns

chown named:named /var/named/chroot/var/named/slaves/ddns

chmod 755 /var/named/chroot/var/named/slaves/ddns

chcon -t named_cache_t /var/named/chroot/var/named/slaves/ddns

touch /var/named/chroot/var/named/slaves/ddns/example.com.zone

chown named:named /var/named/chroot/var/named/slaves/ddns/example.com.zone

touch /var/named/chroot/var/named/slaves/ddns/0-168-192.zone

chmod named:named /var/named/chroot/var/named/slaves/ddns/0-168-192.zone
Edit the zone files and just create SOA and NS records
BIND /var/named/slaves/ddns/example.com.zone
BIND chroot /var/named/chroot/var/named/slaves/ddns/example.com.zone
$TTL 86400

@ IN SOA ns1.example.com. dnsadmin.example.com. (

[serial]

[refresh]

[retry]

[expire]

[minimum-ttl]

)

@ IN NS ns1.example.com.

ns1 IN A [ip-of-dns-server]
BIND /var/named/slaves/ddns/0-168-192.zone
BIND chroot /var/named/chroot/var/named/slaves/ddns/0-168-192.zone
$TTL 86400

@ IN SOA ns1.example.com. dnsadmin.example.com. (

[serial]

[refresh]

[retry]

[expire]

[minimum-ttl]

)

@ IN NS ns1.example.com.
Replace [serial], [refresh], [retry], [expire], [minimum-ttl] with their respective values in seconds. Set proper SELinux booleans
setsebool -P named_write_master_zones 1
The boolean is set to allow named to write the DNS updates to the zone file. Allow port 53 through the Linux firewall
iptables -I INPUT -p tcp --dport 53 -j ACCEPT

iptables -I INPUT -p udp --dport 53 -j ACCEPT

service iptables save
Reload the named service
service named reload
Go to the Windows Server, open your network connection properties and enter the preferred DNS address as the address of the Linux DNS server. Go to Start -> run, enter dcpromo and hit enter. Follow the steps in the wizard, if you’re using windows server 2008 just uncheck DNS installation option and continue installation of Active Directory. After the Windows server reboots check the /var/log/messages file in your Linux server you’ll see the updates that have taken place.

Just remember to set the preferred DNS server of the client computers to the IP address of the Linux DNS server before joining them to the domain.


Hi Jesin, TY for this kind of post,
I got Windows Server 2000 Advanced shared drive utilizing Active Directory access on this Server, my question is if I proceed now does their access on shared drive will not be affected even if I migrated the DHCP & DNS services to CentOS 6.5? BTW this Windows Server is not a Domain Controller, it’s just File Server, DHCP & DNS Server to be migrated. Do I need to follow you thru here as above? TIA
why do you have those “BIND users” and “BIND chroot” there? what does it mean?