In the previous article we how to configure Cisco routers and switches for telnet access and in this article we’ll see how to do the same with SSH. SSH is always preferred because it is very much secure than telnet. A quick intro on SSH, it expands to Secure Shell, listens on port 22, uses public key cryptography technique for encryption. Because SSH uses keys we need to generate one on the router. To connect using SSH from a windows system a third party software such as putty us needed, but for Linux users a SSH client is built into all distributions.
Follow the commands below to configure your Cisco router for SSH access.
Router>enable

Router#configure terminal

Router(config)#hostname Router1

Router(config)#enable secret password

Router1(config)#ip domain-name websistent.com

Router1(config)#crypto key generate rsa

......Output omitted................

How many bits in the modulus [512]: 2048

% Generating 2048 bit RSA keys, keys will be non-exportable...[OK]

Router1(config)#username jesin password sshpwd

Router1(config)#service password-encryption

Router1(config)#line vty  0 4

Router1(config-line)#transport input ssh
Setting a hostname other than the work “Router” is mandatory for SSH to work. If you haven’t set a privileged mode password already use the enable secret command to set the password of your choice. The number 2048 is the size of the key, a larger size makes it more difficult to hack the connection but is also makes the connection slow. In the last transport command you can include “telnet” at the end if you want both telnet and SSH access. Another way to configure SSH access with setting privileged mode password can also be done by setting the privilege level of the username to 15.
Router>enable

Router#configure terminal

Router(config)#hostname Router1

Router1(config)#ip domain-name websistent.com

Router1(config)#crypto key generate rsa

...................output omitted............................

How many bits in the modulus [512]: 2048

% Generating 2048 bit RSA keys, keys will be non-exportable...[OK]

Router1(config)#username jesin privilege 15 secret sshpw

Router1(config)#line vty 0 4

Router1(config-line)#login local

Router1(config-line)#transport input ssh
The “privilege 15” in the username command will ensure the user will always be logged in to privilege mode. The word “secret” instead of password store the password in encrypted format
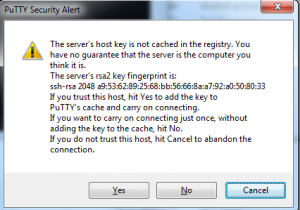
To connect using telnet on windows download PuTTY. Open it enter your router’s IP address or hostname and click connect. The first time you’ll see an alert message like the one below.

Click “Yes”, enter your username and password and start managing your router. On Linux systems the SSH client is installed along with the OS, so just use the following command.
ssh username@hostname-or-ip-address

It may be six years after your post was made, but this was the exact information I was looking for. Thanks