Google Apps is a service provided by Google using which you can create an email account with your own domain name. The advantage is the email service is powered by GMail which gives you features like 8GB inbox and the ability to chat with other GMail fellow mates. Whats more all other services provided by Google are also available for your domain. Take Google Docs for example, using Gogole Apps you can share documents within the users of your domain. On the free version of Google Apps you can create upto 50 users. In this tutorial I’ll show you how to setup Google Apps for your domain. For setting up Windows Live Domains see that article.
Step1: Register at Google Apps
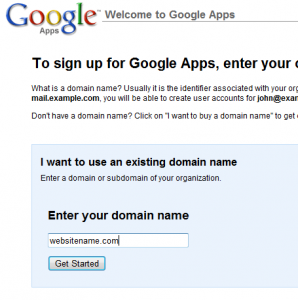
Register for Google Apps by going to https://www.google.com/a/cpanel/domain/new, enter your domain name. You should’ve already registered this domain name.
 In the next page fill in your personal details and enter an email ID. This email address should be outside your domain. This will be your secondary address, if you forget the password of your domain administrator account this email will be used to reset the password.
 Now is the time to create your first email account for the domain. This email address will be the administrator of the domain and has the ability to add, delete and modify other users’ passwords.
 The final process in this step is to verify that you own the domain name. There are numerous methods for this and the “Recommended method” is to create a DNS record. To make things simpler I’ll be showing you “Upload a HTML file to your server” method. Select “Alternate methods” tab to access this.
 Just follow the steps given in the screenshot, download the HTML file, upload the file via FTP/Web Hosting Control Panel, check whether the has uploaded correctly and click “Verify Now” Button.
Step2: Setup MX records
To know about MX record read the article Types of DNS records. Go to the “Dashboard” and in “Service Settings” section click “Activate Email” under Email.
 You’ll be presented with a page containing instructions for setting up MX records for Google Apps. Even though one MX record is enough for receiving emails it is recommended to create all 7 MX records for redundancy. Since most Web Hosting providers have CPanel I’ll tell you the steps for setting up MX records in CPanel. After logging into CPanel go to “MX Entry” under the “Mail” section. Select your domain name and delete any existing records and create MX records with the mentioned priorities.
 The MX records for Google Apps with the priorities are shown below
| MX Server address | Priority |
|---|---|
| ASPMX.L.GOOGLE.COM. | 10 |
| ALT1.ASPMX.L.GOOGLE.COM. | 20 |
| ALT2.ASPMX.L.GOOGLE.COM. | 20 |
| ASPMX2.GOOGLEMAIL.COM. | 30 |
| ASPMX3.GOOGLEMAIL.COM. | 30 |
| ASPMX4.GOOGLEMAIL.COM. | 30 |
| ASPMX5.GOOGLEMAIL.COM. | 30 |
After doing this click the “I’ve completed these steps” button.
Step3: Setup TXT records (optional)
Setting up TXT records for you domain will ensure email sent from your domain is not checked to see if it was sent from Google’s mail servers or from some other rogue mail server. To setup TXT records in CPanel click “Advanced DNS Zone Editor” under the “Domains” section, select you domain name and enter the following values. If there is no “Advanced DNS Zone Editor” contact you hosting provider to create the records for you.
Name: yourdomainname.com
TTL: 86400 (can be set to anything that suits you)
Type: TXT
TXT Data: v=spf1 include:_spf.google.com ~all
Step4: Setup Email authentication (DKIM) (optional)
Setting up email authentication will ensure all email sent from your domain are signed to maintain the integrity. To know more about DKIM see http://en.wikipedia.org/wiki/DKIM. Go to the “Advanced Tools” section from the Google Apps administration panel and click “Set up email authentication (DKIM)” link.
 Enable email authentication, use the default DNS hostname “google._domainkey”. The TXT record name and record value are displayed.
 Go to your web hosting control panel and create a new TXT record named google._domainkey.yourdomainname.com and enter the value shown in the Google Apps “Authenticate Email” page. Be very careful not to miss anything in the TXT record value.
 Wait for sometime and when Google Apps “Authenticate Email” page shows “Status: Authenticating Email”.
Step5: Setup CNAME records (optional)
To access any service for your domain you should type the entire Google URL followed by your domain name. For example for accessing email you should type http://mail.google.com/a/yourdomainname.com. To make things cool we’ll create an alias for it so that you can use mail.yourdomainname.com for email, docs.yourdomainname.com for Google Docs and so on. To create a CNAME for a particular service login to your Google Apps account, go to settings, select a service, and click “Change URL”
 Enter the name you wish to use for that service and click “save changes” button.
 For this custom URL to work you need to create CNAME records from your web hosting control panel. Enter the following values for creating a CNAME
Name: mail (this is the value entered in the Google Apps settings)
Type: CNAME
Value: ghs.google.com
Winding up everything
To check the MX records, TXT records and CNAME records use the DNS Lookup Tool. When you enter your domain name you’ll see the MX records and TXT record entered in step 3, to verify CNAME records enter the complete URL, e.g. mail.yourdomainname.com, for verifying DKIM email authentication enter google._domainkey.yourdomainname.com. For a complete checkup send emails TO admin@yourdomainname.com from other email IDs and see whether you receive the email. Then send emails FROM admin@yourdomainname.com TO a GMail account open the email and see if your domain name is shown as “signed by”
 Here is a list of URLs for your domain, just replace example.com with your domain name.
Managing your domain: http://www.google.com/a/example.com
Accessing Email services: http://mail.google.com/a/example.com (replace "mail" with docs, sites to those services)
Creating users: http://www.google.com/a/cpanel/example.com/Organization
If you have any doubts or problems just drop in a comment.


Leave a Reply