ServerPilot the lightweight hosted control panel integrates well with Let’s Encrypt to generate free SSL certificates with a click of a button. ServerPilot calls this feature AutoSSL and makes it available only on the Coach plan that costs $10/month/server. But by using some custom Nginx configuration we can get Let’s Encrypt working on the free plan. That means you can have an unlimited number of SSL certificates that automatically renew once in three months.
If you haven’t tried ServerPilot, use my referral link to sign up and earn $10 in credit 🙂
Install certbot
Login to your server via SSH and execute the following command. You must be a root user or a user with sudo privileges.
sudo apt-get install software-properties-common
sudo add-apt-repository ppa:certbot/certbot
sudo apt-get update
sudo apt-get install certbot
We need the document root and the domains for the apps that need certificates. If you already know this skip to the next step. Usually the document root is /srv/users/serverpilot/apps/APPNAME/public. The following command extracts the document root from the App’s Nginx virtual host file. Replace APPNAME with your App’s name.
egrep '^\s*root\s+.+;$' /etc/nginx-sp/vhosts.d/APPNAME.conf
Example output:
root /srv/users/serverpilot/apps/APPNAME/public;
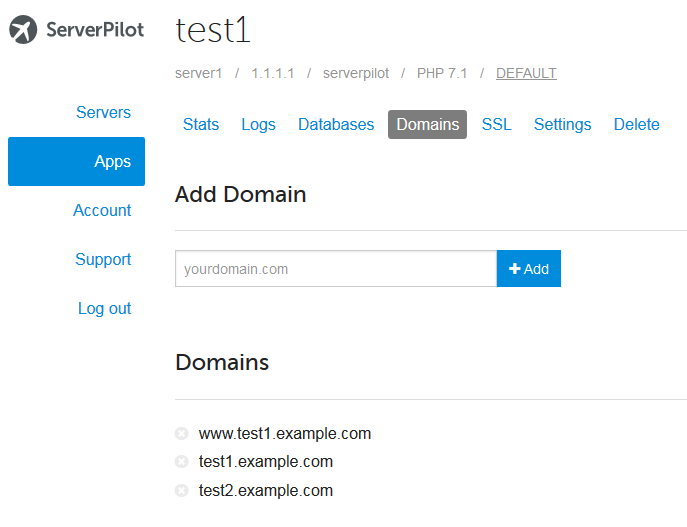
Note down the App’s domain names from the “Domains” tab.
You can also use the following command to get the domains served by an app.
sed -e '/server_name/,/\;/!d' /etc/nginx-sp/vhosts.d/APPNAME.conf
Example output:
    server_name
        server-appname
        example.com
        www.example.com
      ;
Ignore the first “server-appname” domain and take note of the rest.
Based on the information collected execute the following command replacing the document root and domain names. Add any additional domain names to the end of the command with a -d argument. Eg. -d example.net. Replace “user@example.com” with your email address. It’ll be used to send you alerts when certificates are about to expire.
sudo certbot certonly --agree-tos --non-interactive --email user@example.com --webroot -w /srv/users/serverpilot/apps/APPNAME/public -d example.com -d www.example.com
Note: This command must be executed for each ServerPilot app for which you need an SSL certificate.
Configure Nginx
Execute the following command to list the private key and certificate locations.
sudo certbot certificates
Create and edit a file named ssl.conf inside the /etc/nginx-sp/vhosts.d/APPNAME.d/ directory. Replace the file paths in the highlighted lines with your certificate locations.
/etc/nginx-sp/vhosts.d/APPNAME.d/ssl.conf
listen  443 ssl http2;

ssl_certificate         /etc/letsencrypt/live/example.com/fullchain.pem;
ssl_certificate_key     /etc/letsencrypt/live/example.com/privkey.pem;
ssl_trusted_certificate /etc/letsencrypt/live/example.com/chain.pem;
ssl_session_cache       shared:SSL:20m;
ssl_session_timeout     10m;

ssl_stapling            on;
ssl_stapling_verify     on;
resolver                8.8.8.8 8.8.4.4;

set $ssl_status off;

if ($scheme = "https") {
        set $ssl_status on;
}

proxy_set_header X-Forwarded-Proto $scheme;
proxy_set_header X-Forwarded-Ssl $ssl_status;
Save the file and do a configuration test.
sudo service nginx-sp configtest
This should return something similar to the following:
nginx: the configuration file /etc/nginx-sp/nginx.conf syntax is ok
nginx: configuration file /etc/nginx-sp/nginx.conf test is successful
Now reload Nginx:
sudo service nginx-sp reload
That’s it, all the domains in your app should now have valid Let’s Encrypt certificates.
Automating renewal
Certbot already has a cron job in place to automatically renew certificates that will expire within 30 days. However Nginx has to be reloaded in order to utilize the renewed certificates. So we’ll create a shell script and place it inside /etc/letsencrypt/renew-hook.d/. Scripts placed this directory are executed each time certificates are renewed.
Create the a file:
/etc/letsencrypt/renew-hook.d/reload-nginx
with the following contents:
#!/bin/sh
service nginx-sp reload
Grant executable permissions to this file:
sudo chmod +x /etc/letsencrypt/renew-hook.d/reload-nginx
Certbot uses the run-parts command to execute scripts in this directory, so it is better to test if run-parts identifies this script.
run-parts --test /etc/letsencrypt/renew-hook.d
This should output the name of the file (reload-nginx). Hope this tutorial help you implement Let’s Encrypt certificates on a free ServerPilot plan. If not, you can always hire me to do this for you.


Hi, thank you for the guide, but I have a problem 🙁 At the end I have this error:
I tried also service nginx configtest but nothing, always unrecognixed service 🙁
I have Serverpilot and Ubuntu 16.04.
Thank you in advance
Hi Deb,
Try this command instead:
Thank you very muchhhh!! :*
nginx: the configuration file /etc/nginx-sp/nginx.conf syntax is ok
nginx: configuration file /etc/nginx-sp/nginx.conf test is successful
Thank you very much 🙂
I get an error message that the directory/file cannot be found when I try to enter /etc/letsencrypt/renew-hook.d/
Will things still work if I just make a new directory of “renew-hook.d”?
It seems like certain versions of certbot don’t create these directories. So in addition to creating this directory also edit
/etc/cron.d/certbotand add--renew-hook /etc/letsencrypt/renew-hook.d/reload-nginxto the end.The last line should look like this:
I’m sorry, I’m still a newbie with this. So I entered the below in the command line and got a message saying it’s not a directory
CODE I ENTERED IN TERMINAL: cd /etc/crond/certbot
Oops the code was: cd/etc/cron.d/certbot
I figured it out!! Please disregard and thank you so much for this tutorial!
Hi, does conf file need to be updated to work with cloudflare when cert need to be renewed? I’m reading Cloudflare’s knowledge base: https://support.cloudflare.com/hc/en-us/articles/214820528-How-to-Validate-a-Let-s-Encrypt-Certificate-on-a-Site-Already-Active-on-Cloudflare
Bottom or their article reads:
“When it comes time for renewal, using the letsencrypt renew command should allow the cert to be renewed successfully without any Cloudflare configuration changes, provided the .conf file the letsencrypt client uses for the renewal has authenticator = webroot specified, the validation URL is accessible over HTTP, and there are no redirects applied for that URL.”
Hi Jay,
The certbot command used in this article already uses the “webroot” method for authentication, so no changes are required for renewal.
Thanks Jesin. You might want to add the command “sudo certbot renew –dry-run” to your article as another way to test whether certbot renewal will work correctly.